This article may contain affiliate links. If you click on these links and make a purchase, we may receive a small commission at no extra cost to you. This helps support our website and allows us to continue to produce content like this. Thank you for your support!
If you’re looking to add a sprinkle of fun to your Easter celebrations, these cute Easter desserts are just what you need! From fluffy bunny-shaped treats to colorful egg-themed confections, there’s something here to delight both kids and adults alike. Get ready to whip up some delightful sweets that will brighten your holiday table and bring smiles all around!
Carrot Cake Truffles
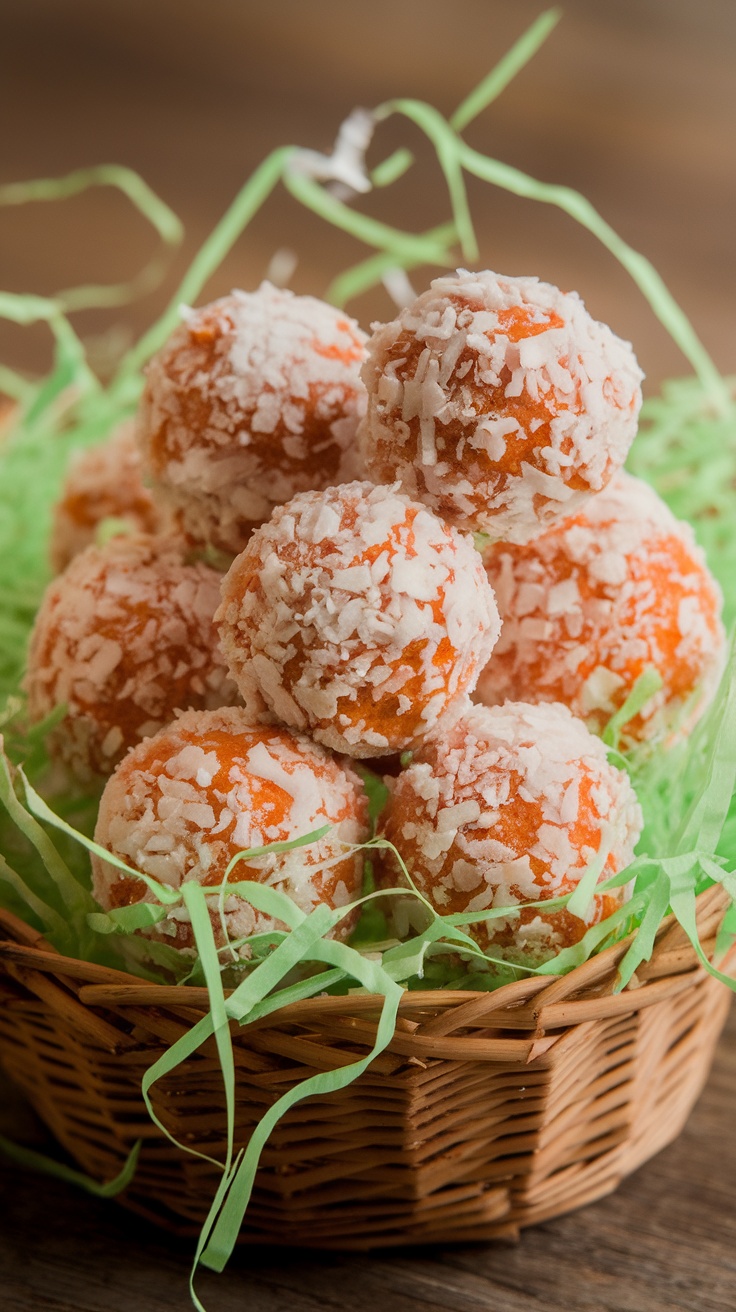
Carrot cake truffles are a delightful twist on the traditional carrot cake. With their soft, sweet centers and a coating of coconut, these treats are perfect for Easter festivities. They boast a rich flavor profile that combines the warmth of spices with the sweetness of carrots, making them a hit for both kids and adults.
Not only are these truffles tasty, but they are also quite simple to prepare. You’ll find that the steps are straightforward and require minimal ingredients, so they can be whipped up in no time. Serve them up for a fun dessert or gift them in a cute basket for friends and family.
Ingredients
- 1 cup grated carrots
- 1 cup cream cheese, softened
- 2 cups crushed graham crackers
- 1 teaspoon ground cinnamon
- 1/2 teaspoon ground nutmeg
- 1/4 cup shredded coconut
- 1/4 cup powdered sugar
- 1 teaspoon vanilla extract
- 1 cup coconut flakes for coating
Instructions
- In a bowl, combine grated carrots, cream cheese, crushed graham crackers, cinnamon, nutmeg, powdered sugar, and vanilla extract. Mix until well combined.
- Chill the mixture in the refrigerator for about 30 minutes to firm it up.
- Once chilled, scoop out small portions and roll them into balls, about 1 inch in diameter.
- Roll each ball in coconut flakes until fully coated.
- Place the truffles on a baking sheet lined with parchment paper and refrigerate for another 30 minutes before serving.
Mini Bunny Cheesecakes
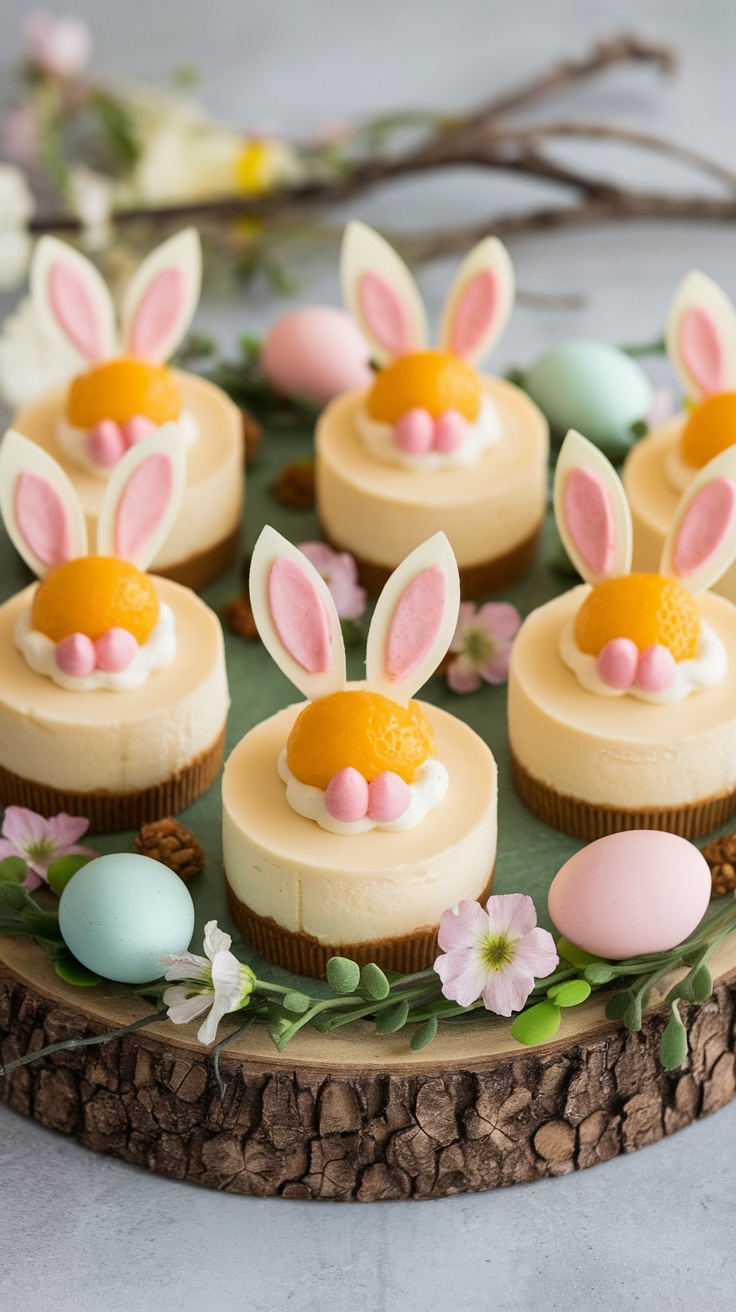
Mini Bunny Cheesecakes are a delightful treat that combines the creamy richness of cheesecake with an adorable bunny design, making them perfect for Easter celebrations. These individual desserts are not only pleasing to the eye but also to the palate, offering a sweet and tangy flavor that pairs beautifully with a buttery graham cracker crust.
Making these cheesecakes is surprisingly simple, even for beginners. With just a few key ingredients and some creativity, you can whip up a batch that will impress family and friends. Each bite is creamy with a hint of citrus, topped with playful decorations that make them a fun addition to your dessert spread.
Ingredients
- 1 ½ cups graham cracker crumbs
- ½ cup unsalted butter, melted
- 1 cup cream cheese, softened
- ½ cup granulated sugar
- 1 teaspoon vanilla extract
- 2 large eggs
- ½ cup sour cream
- 1 teaspoon lemon juice
- Decorations: Whipped cream, peach slices, pink candy, and white chocolate
Instructions
- Preheat your oven to 325°F (160°C). Line a muffin tin with paper liners.
- In a bowl, mix the graham cracker crumbs with melted butter until combined. Press this mixture into the bottom of each muffin liner to form the crust.
- In another bowl, beat the cream cheese until smooth. Gradually add sugar and vanilla, mixing until well combined.
- Add the eggs one at a time, mixing well after each addition. Stir in sour cream and lemon juice until smooth.
- Pour the cheesecake batter over the crusts in the muffin tin, filling each liner about ¾ full.
- Bake for 18-20 minutes or until the centers are set but slightly jiggly. Turn off the oven and let the cheesecakes cool for an hour inside the oven with the door slightly ajar.
- Once cooled, refrigerate for at least 4 hours or overnight.
- Before serving, decorate with whipped cream for the bunny’s “fluffy tail,” use peach slices as the bunny’s face, and add pink candy for the nose and ears made from white chocolate.
Peep S’mores
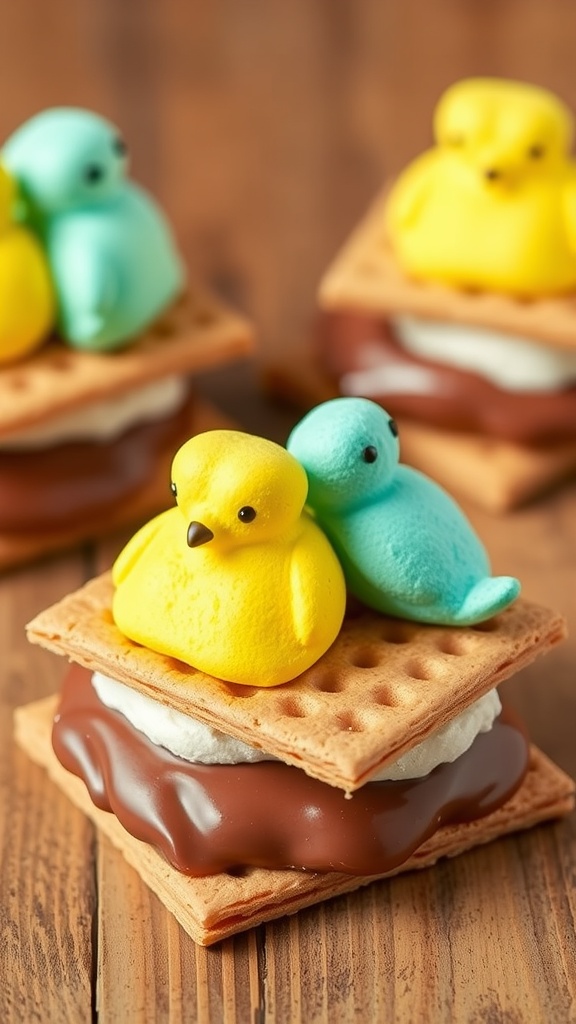
Peep S’mores are a fun twist on the classic campfire treat, adding a splash of color and sweetness that’s perfect for Easter. Imagine the gooeyness of melted chocolate, the soft chew of marshmallows, and the crunch of graham crackers, all combined with adorable marshmallow Peeps. They’re easy to make and sure to bring smiles to both kids and adults alike!
This delightful dessert is not just simple; it’s also a creative way to celebrate the season. Just gather your ingredients and get ready to enjoy a sweet treat that’s as cute as it is delicious. Whether you’re hosting a gathering or just enjoying a cozy night, Peep S’mores are sure to brighten up your evening.
Ingredients
- 2 graham crackers
- 1 piece of milk chocolate (or any chocolate of your choice)
- 3-4 Peeps (any color)
- 1 marshmallow (optional, for extra fluffiness)
Instructions
- Prepare your fire or oven: If you’re using a campfire, ensure it’s hot and ready. If indoors, preheat your oven to 350°F (175°C).
- Assemble your s’more: Place a piece of chocolate on one graham cracker. Add the Peeps on top of the chocolate.
- Toast: If using a campfire, hold your s’more over the flames until the chocolate melts and the Peeps become gooey. If using an oven, place the s’more on a baking sheet and bake for about 5 minutes, or until the chocolate is melted.
- Top it off: Once the chocolate and Peeps are melted, add the second graham cracker on top and gently press down.
- Enjoy: Let it cool for a moment, then dig in and enjoy your delightful Peep S’mores!
Chick Sugar Cookies
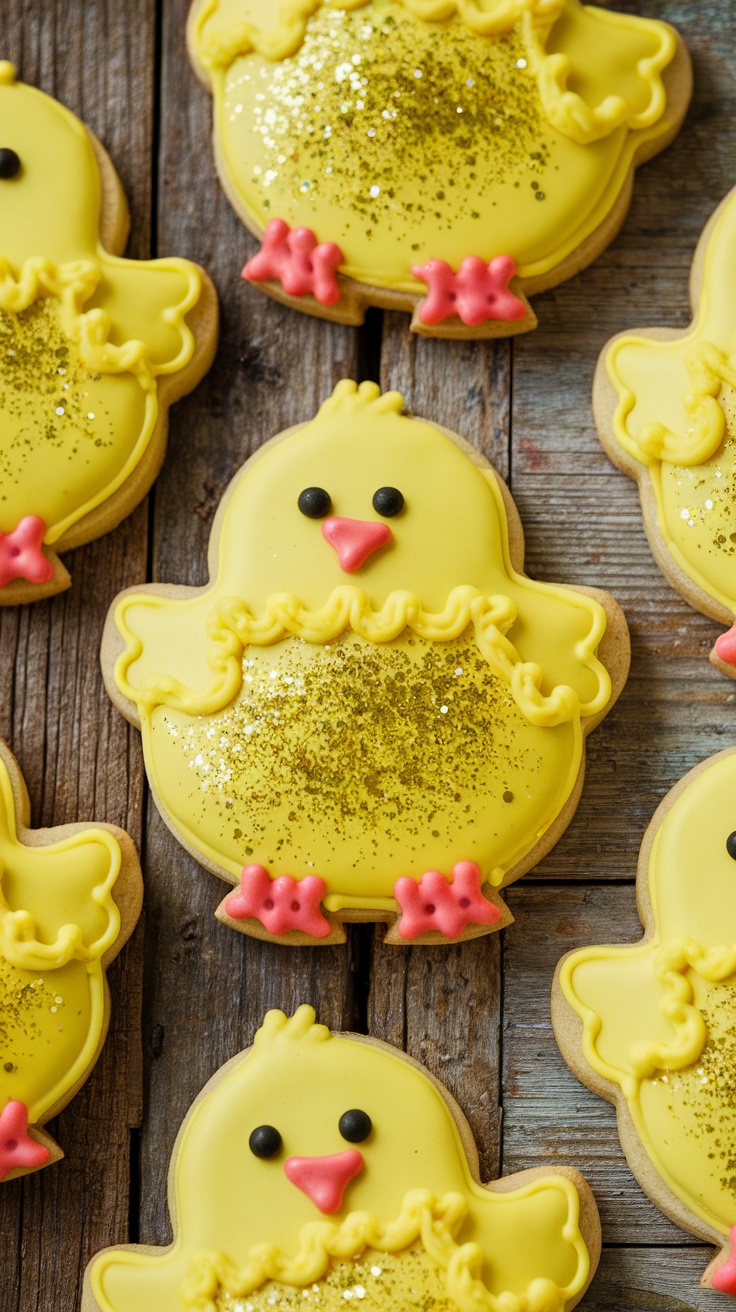
These playful chick sugar cookies are a delightful treat for Easter celebrations. Soft and sweet, they are made with a buttery dough that melts in your mouth, and they are topped with bright yellow icing that brings a cheerful vibe to any gathering. Not only are they visually appealing, but they also boast a delicious flavor that’s a hit with both kids and adults.
Making these cookies is quite simple, making it an enjoyable baking project to share with family or friends. With a little icing and some fun decorations, you can create adorable little chicks that will surely bring smiles. Let’s dive into the recipe!
Ingredients
- 2 ¾ cups all-purpose flour
- 1 teaspoon baking powder
- ½ teaspoon salt
- 1 cup unsalted butter, softened
- 1 ½ cups granulated sugar
- 1 large egg
- 1 teaspoon vanilla extract
- Yellow fondant or yellow icing for decoration
- Mini chocolate chips for eyes
- Red icing for beak and feet
Instructions
- Prepare the Dough: In a bowl, whisk together flour, baking powder, and salt. In another bowl, beat the softened butter and sugar until light and fluffy. Add the egg and vanilla, mixing until well combined. Gradually add the dry ingredients to the wet ingredients, mixing until a dough forms.
- Chill the Dough: Wrap the dough in plastic wrap and refrigerate for at least 1 hour. This helps the cookies maintain their shape while baking.
- Shape and Bake: Preheat your oven to 350°F (175°C). Roll out the chilled dough on a floured surface to about ¼ inch thick. Use a chick-shaped cookie cutter to cut out the cookies and place them on a baking sheet lined with parchment paper. Bake for 8-10 minutes or until the edges are lightly golden. Allow them to cool completely.
- Decorate: Once cooled, cover the cookies with yellow fondant or icing. Use mini chocolate chips for the eyes and red icing to create beaks and feet. Let everything set before serving.
Fruit Topped Pavlova Nests
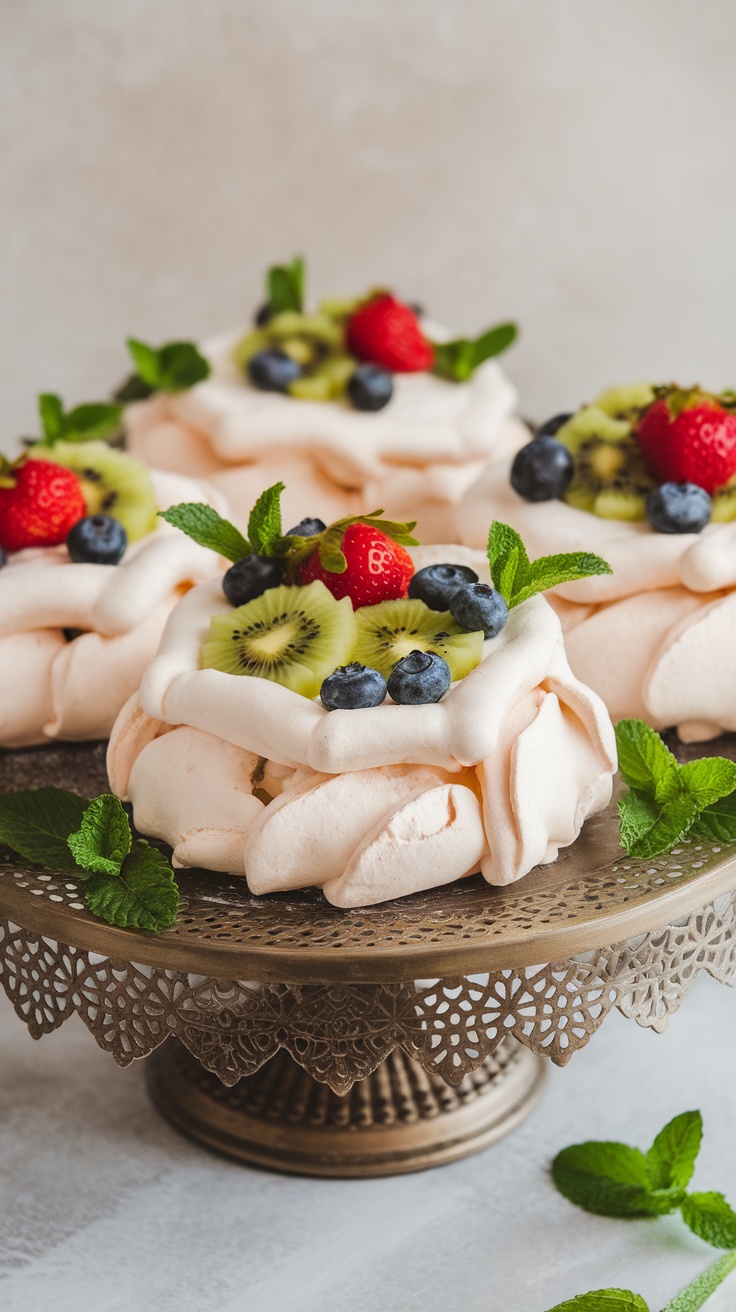
Fruit Topped Pavlova Nests are a delightful twist on the classic pavlova. This dessert features a crispy outer shell with a soft and marshmallow-like interior, making it a light and airy treat. Topped with fresh fruit, these nests bring a burst of flavor and color, perfect for celebrating Easter or any spring gathering.
Not only do they taste delicious with the sweetness of meringue and the tartness of the fruits, but they are also simple to make. With just a few ingredients, you can create a stunning dessert that is sure to impress family and friends.
Ingredients
- 4 large egg whites
- 1 cup granulated sugar
- 1 teaspoon vanilla extract
- 1 teaspoon white vinegar
- 1 cup heavy cream
- 2 tablespoons powdered sugar
- Fresh mixed berries (strawberries, blueberries, raspberries)
- Kiwi, sliced
- Fresh mint leaves for garnish
Instructions
- Preheat your oven to 225°F (110°C) and line a baking sheet with parchment paper.
- In a clean mixing bowl, beat the egg whites on medium speed until soft peaks form. Gradually add in the granulated sugar, continuing to beat until the mixture becomes glossy and stiff peaks form.
- Mix in the vanilla extract and white vinegar, ensuring everything is well combined.
- Using a spatula, transfer the meringue to the prepared baking sheet, shaping it into small nests with an indentation in the center.
- Bake for 1-1.5 hours, or until the nests are crisp and can easily peel off the parchment. Turn off the oven and let them cool completely inside.
- Once cooled, whip the heavy cream with powdered sugar until soft peaks form. Spoon the whipped cream into the center of each meringue nest.
- Top with fresh berries, kiwi slices, and garnish with mint leaves before serving.
Chocolate Egg Nest Cookies
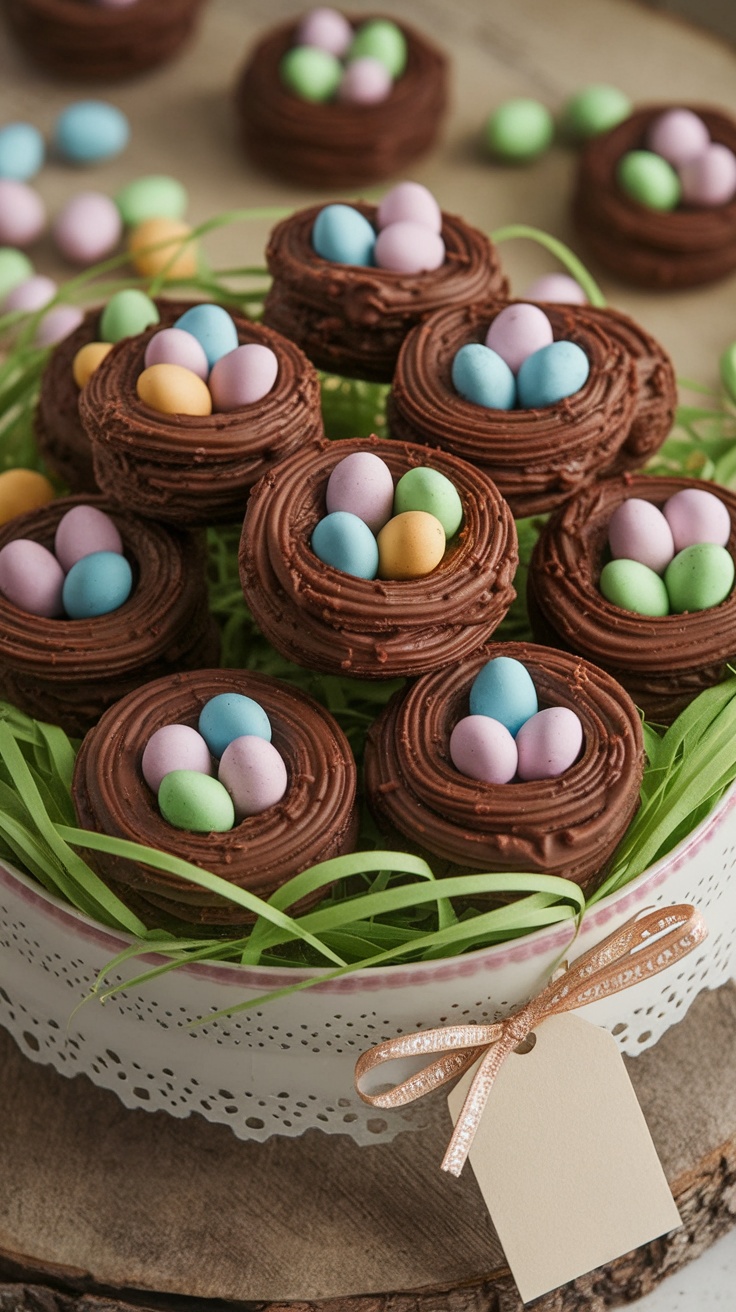
These Chocolate Egg Nest Cookies are a delightful treat that perfectly capture the essence of springtime. With a rich chocolate flavor and a fun, festive look, they are both delicious and visually appealing. Making these cookies is a breeze, making them a perfect project for kids and adults alike.
The cookies feature a soft chocolate base topped with creamy frosting, resembling charming little nests filled with colorful candy eggs. They are a whimsical addition to any Easter celebration and are sure to bring smiles to everyone.
Ingredients
- 1 cup unsalted butter, softened
- 1 cup granulated sugar
- 2 large eggs
- 1 teaspoon vanilla extract
- 2 cups all-purpose flour
- 1/2 cup cocoa powder
- 1 teaspoon baking soda
- 1/2 teaspoon salt
- 2 cups chocolate frosting
- 1 cup mini candy eggs (like Cadbury Mini Eggs)
Instructions
- Preheat the oven to 350°F (175°C). Line a baking sheet with parchment paper.
- In a large bowl, cream together the softened butter and granulated sugar until light and fluffy. Beat in the eggs and vanilla extract until well combined.
- In a separate bowl, whisk together the flour, cocoa powder, baking soda, and salt. Gradually mix the dry ingredients into the wet ingredients until a soft dough forms.
- Drop tablespoon-sized balls of dough onto the prepared baking sheet, spacing them about 2 inches apart. Flatten each ball slightly with your fingers.
- Bake for 10-12 minutes, or until the cookies are set. Remove from the oven and let them cool completely on a wire rack.
- Once cooled, use a piping bag to swirl chocolate frosting on top of each cookie to create a nest shape. Carefully place 3-4 mini candy eggs in the center of each nest. Enjoy your cute Easter treats!
Easter Egg Macarons
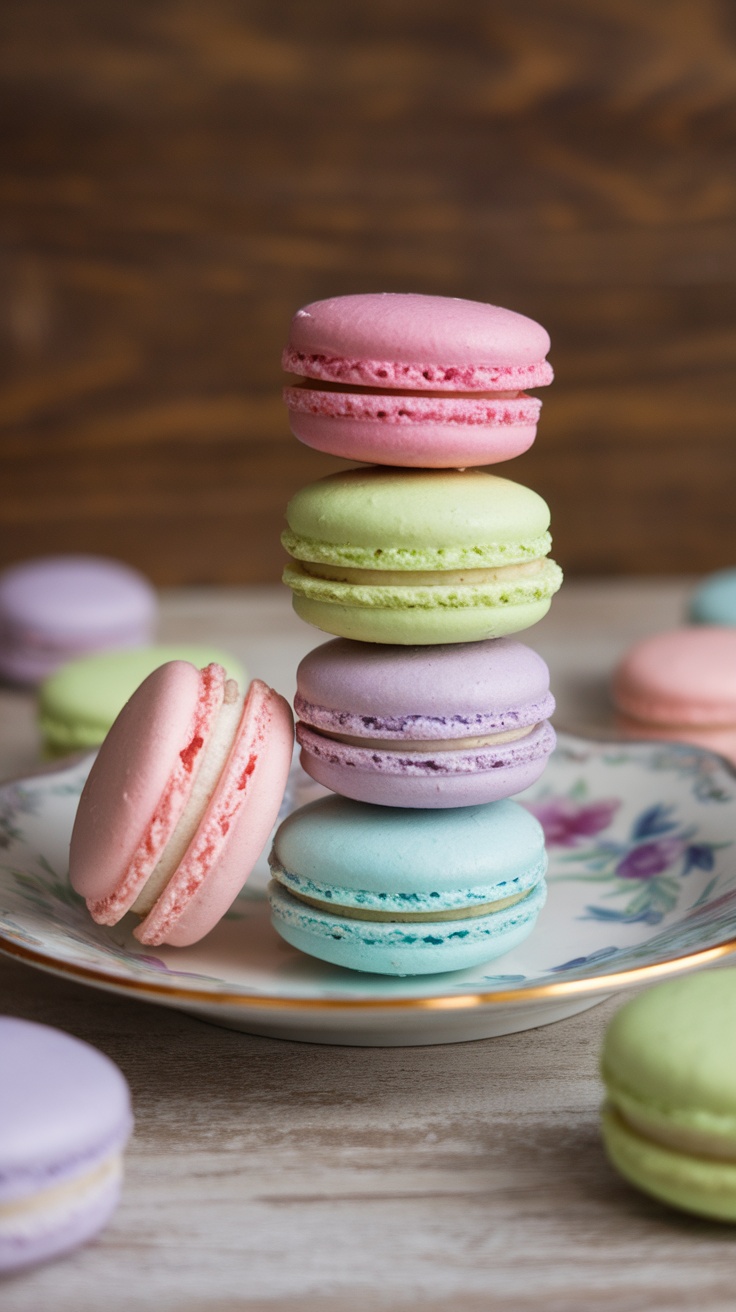
These Easter Egg Macarons are a delightful twist on the classic French treat, offering a burst of springtime flavors and colors. Light, crisp shells with a chewy interior are perfect for celebrating the season. With a variety of pastel shades and flavors, they make for a fun and festive dessert that anyone can enjoy.
Making macarons might seem intimidating, but with a little patience and practice, you’ll find it’s a straightforward process. Each bite brings a sweet and delicate flavor that can be customized to your taste. Whether you fill them with buttercream, ganache, or fruit preserves, these treats are sure to impress!
Ingredients
- 1 cup almond flour
- 1 3/4 cups powdered sugar
- 3 large egg whites
- 1/4 cup granulated sugar
- 1/4 teaspoon cream of tartar
- Food coloring (your choice of pastel colors)
- 1/2 cup butter, softened
- 1 cup powdered sugar (for filling)
- 1 teaspoon vanilla extract
Instructions
- Prepare the Dry Ingredients: Sift together almond flour and powdered sugar into a bowl. Set aside.
- Make the Meringue: In a clean bowl, beat egg whites and cream of tartar until soft peaks form. Gradually add granulated sugar and continue beating until stiff peaks form.
- Add Color: Divide meringue into separate bowls if using multiple colors. Add food coloring and gently fold until desired shades are achieved.
- Combine: Gently fold the dry ingredients into the meringue until combined. Do this carefully to maintain the airiness of the mixture.
- Piping: Transfer the mixture to a piping bag fitted with a round tip. Pipe small circles onto a baking sheet lined with parchment paper, leaving space between them.
- Rest: Let the piped macarons sit at room temperature for 30-60 minutes until a skin forms on top.
- Bake: Preheat the oven to 300°F (150°C). Bake for 15-20 minutes, or until the macarons are firm and can be lifted off the parchment easily.
- Make the Filling: Beat together softened butter, powdered sugar, and vanilla until smooth.
- Assemble: Once the macarons are cool, pair them up and spread or pipe the filling between them. Enjoy your festive Easter Egg Macarons!
Bunny Shaped Cupcakes
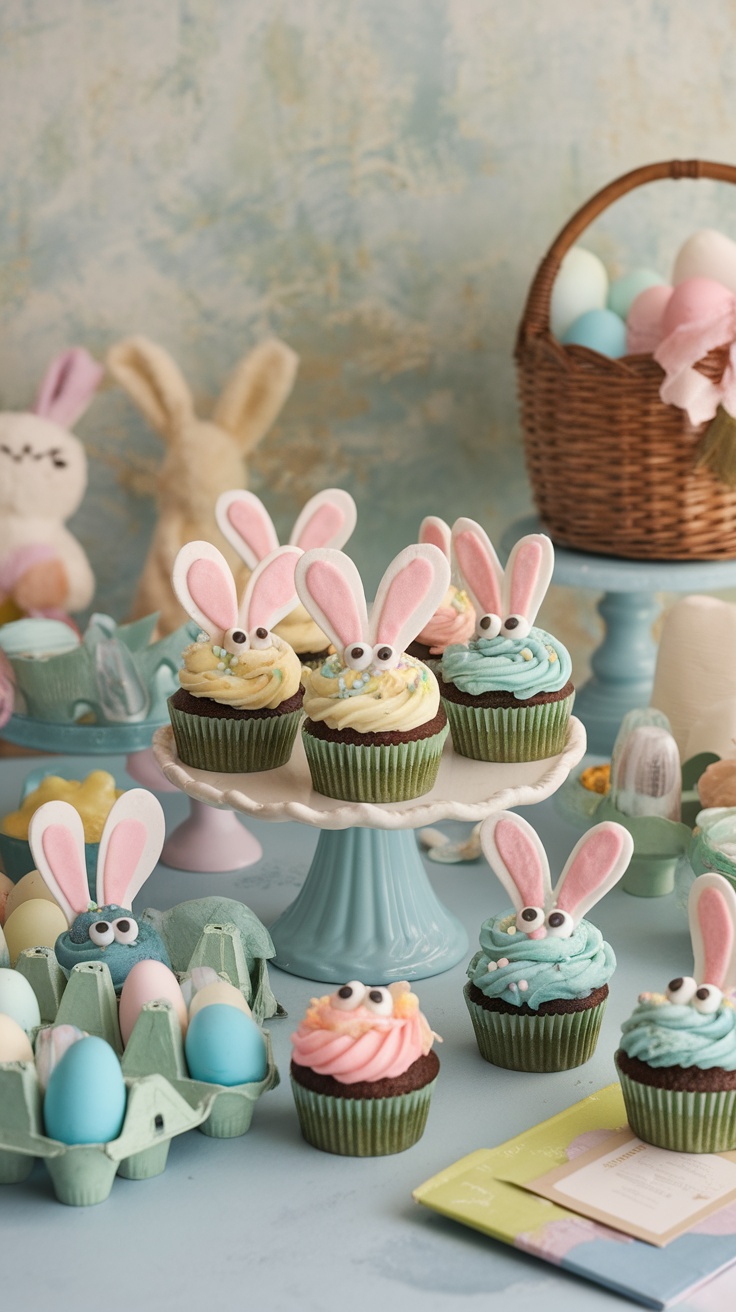
Bunny shaped cupcakes are a delightful treat for Easter celebrations. These cute cupcakes are not only visually appealing but also delicious, featuring fluffy cake and creamy frosting that kids and adults alike will enjoy. Making them is simple, even for novice bakers, allowing you to create a fun dessert that adds a festive touch to your holiday table.
The combination of chocolate or vanilla cupcakes topped with colorful buttercream and playful decorations makes these treats irresistible. The bunny design, complete with adorable ears and googly eyes, will bring smiles to everyone’s faces. Let’s hop right into the recipe!
Ingredients
- 1 box chocolate or vanilla cake mix
- Ingredients needed as per the cake mix box (usually eggs, oil, and water)
- 1 cup unsalted butter, softened
- 4 cups powdered sugar
- 2-3 tablespoons milk
- 1 teaspoon vanilla extract
- Pink and white fondant or colored candy melts for ears
- Edible googly eyes
- Sprinkles for decoration
Instructions
- Prepare the Cupcakes: Preheat your oven to 350°F (175°C). Line a cupcake tin with liners and prepare the cake batter according to the package instructions. Bake for about 18-20 minutes or until a toothpick comes out clean. Let them cool completely.
- Make the Frosting: In a large bowl, beat the softened butter until creamy. Gradually add the powdered sugar, mixing well. Add milk and vanilla extract, beating until you reach a fluffy consistency.
- Decorate the Cupcakes: Using a piping bag, frost the cooled cupcakes with your desired colors. Shape the fondant or melted candy into bunny ears and place them on top of the frosting. Add googly eyes and sprinkles for extra fun!
- Serve and Enjoy: Arrange your bunny cupcakes on a platter and watch them disappear at your Easter gathering!
Coconut Macaroon Bunnies
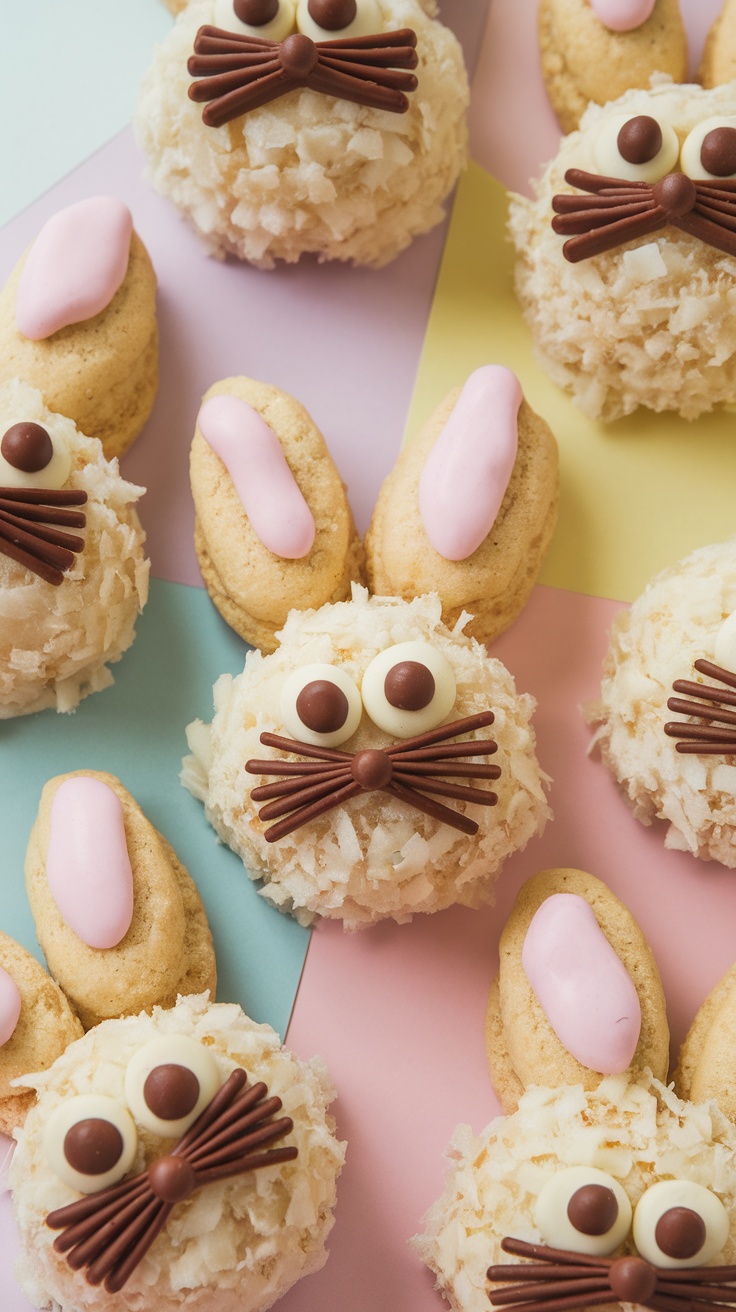
Coconut macaroon bunnies are a delightful treat that perfectly capture the spirit of Easter. These charming little desserts combine the sweet flavor of coconut with a fun, festive presentation. The chewy texture of the macaroon pairs beautifully with chocolate accents, making each bite a tasty celebration.
Simple to make, these bunnies are perfect for bakers of all skill levels. With just a few ingredients, you can whip up a batch that will impress family and friends. Plus, they’re a hit with kids, who will love the playful shape!
Ingredients
- 2 2/3 cups sweetened shredded coconut
- 2/3 cup sweetened condensed milk
- 1 teaspoon vanilla extract
- 1/4 teaspoon almond extract
- 2 large egg whites
- 1/4 teaspoon salt
- Chocolate chips (for eyes and whiskers)
- Pink candy melts or frosting (for ears)
Instructions
- Preheat your oven to 325°F (160°C). Line a baking sheet with parchment paper.
- In a medium bowl, combine the shredded coconut, sweetened condensed milk, vanilla extract, and almond extract. Mix until well combined.
- In another bowl, beat the egg whites and salt until stiff peaks form. Gently fold the egg whites into the coconut mixture.
- Using a small ice cream scoop or spoon, form the mixture into bunny shapes on the prepared baking sheet.
- Bake for 15-20 minutes until the edges are golden brown. Remove from the oven and let cool completely.
- Once cooled, use chocolate chips to create eyes and whiskers, and attach pink candy melts or frosting for the ears.
Spring Fruit Tart
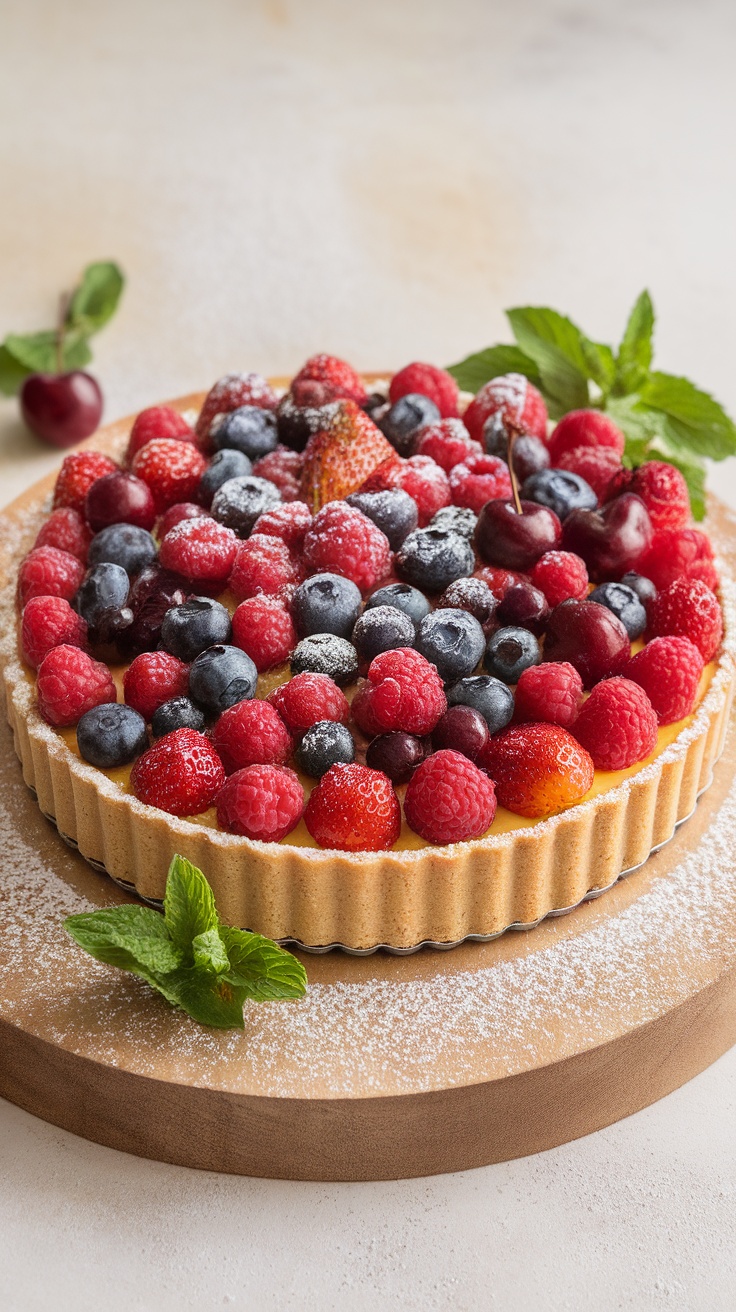
A Spring Fruit Tart is a delightful dessert that showcases the vibrant flavors of fresh seasonal fruits. With a buttery crust and a creamy filling, this tart is both refreshing and satisfying. It’s easy to make, making it a perfect choice for Easter gatherings or any spring celebration.
Each bite offers a balance of sweetness and tartness, thanks to the variety of fruits used. You can customize it with your favorites, creating a colorful and inviting centerpiece for your dessert table.
Ingredients
- 1 1/4 cups all-purpose flour
- 1/4 cup powdered sugar
- 1/2 teaspoon salt
- 1/2 cup unsalted butter, cold and cubed
- 1 large egg yolk
- 2 tablespoons cold water
- 1 cup heavy cream
- 1/2 cup mascarpone cheese
- 1/4 cup granulated sugar
- 1 teaspoon vanilla extract
- 2 cups mixed seasonal fruits (strawberries, blueberries, raspberries, cherries)
- Mint leaves for garnish
- Powdered sugar for dusting
Instructions
- Make the Crust: In a bowl, mix flour, powdered sugar, and salt. Add the cubed butter and blend until crumbly. Mix in the egg yolk and cold water until a dough forms. Press into a tart pan and refrigerate for 30 minutes.
- Pre-bake the Crust: Preheat the oven to 350°F (175°C). Bake the crust for 15-20 minutes or until lightly golden. Let it cool completely.
- Prepare the Filling: In a mixing bowl, whip the heavy cream until soft peaks form. In another bowl, mix mascarpone, sugar, and vanilla until smooth. Gently fold the whipped cream into the mascarpone mixture.
- Assemble the Tart: Spread the filling evenly over the cooled crust. Top with an assortment of fresh fruits, arranging them for a beautiful presentation.
- Serve: Chill the tart for at least 1 hour before serving. Dust with powdered sugar and garnish with mint leaves just before serving.
Rainbow Jelly Cups
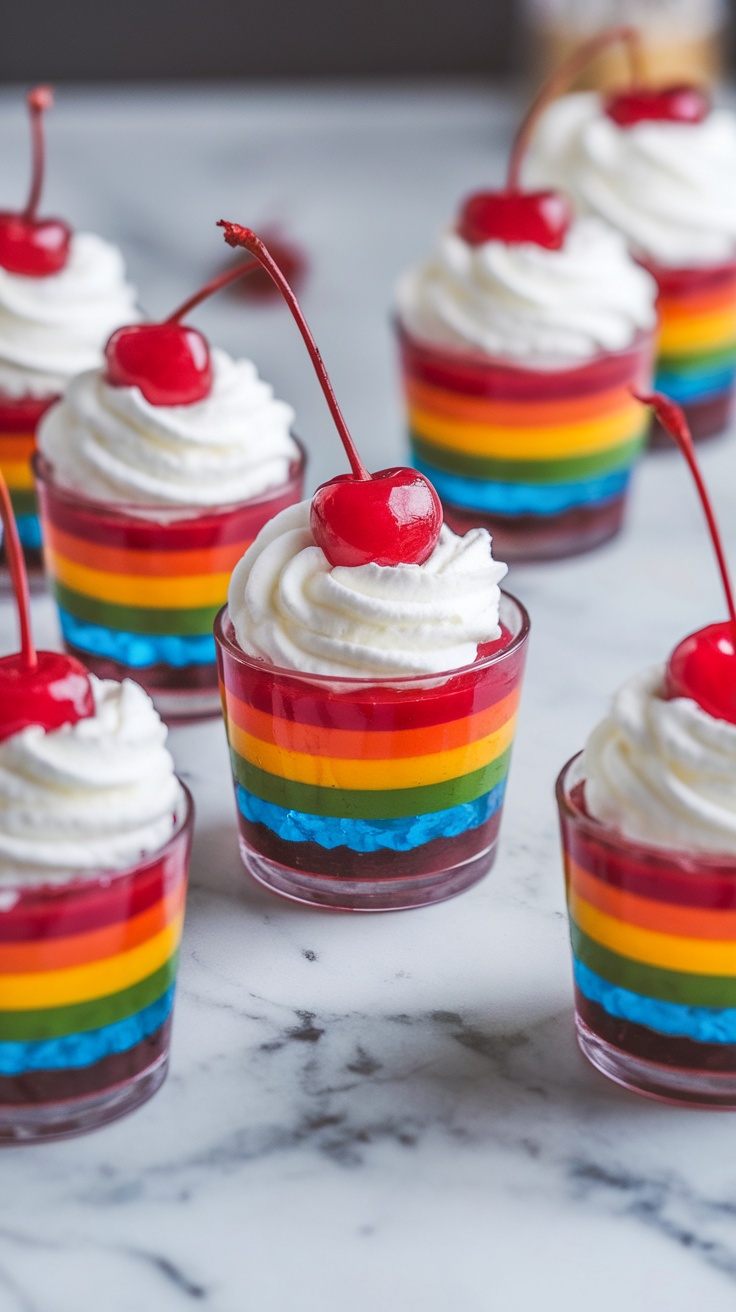
Rainbow Jelly Cups are a fun and vibrant treat that brings a splash of color to your Easter celebrations. These delightful layers of flavored gelatin are not only pleasing to the eye but also offer a sweet, fruity taste that kids and adults will both love. This recipe is simple to make, requiring just a few ingredients and some patience as each layer sets.
Each cup features bright, colorful layers topped with whipped cream and a cherry, making them not just tasty but also a visually appealing dessert. They’re perfect for Easter gatherings, where they can be served as an eye-catching centerpiece or a fun treat for the kids. Let’s get started on this cheerful dessert!
Ingredients
- 3 oz packages of flavored gelatin (e.g., strawberry, orange, lime, grape, blue raspberry)
- 2 cups boiling water
- 2 cups cold water
- Whipped cream for topping
- Maraschino cherries for garnish
Instructions
- Prepare the first layer: In a mixing bowl, dissolve one package of gelatin in 1 cup of boiling water. Stir until completely dissolved.
- Add 1/2 cup of cold water to the mixture. Pour it into clear cups, filling them about one-third full. Refrigerate until set, about 1-2 hours.
- Repeat the process with the other gelatin flavors, allowing each layer to set before adding the next color. Continue until all layers are complete.
- Once the final layer is set, top with whipped cream and a maraschino cherry before serving.
Lavender Honey Panna Cotta
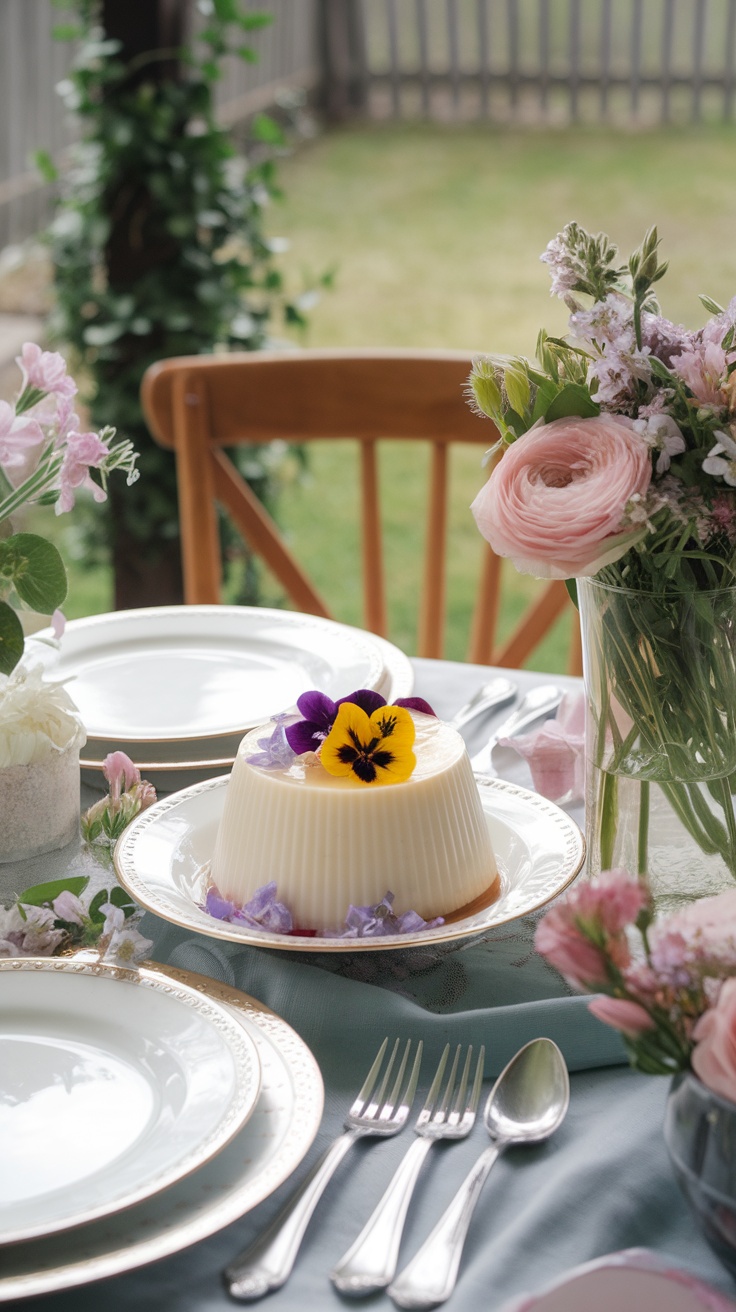
Lavender Honey Panna Cotta is a delightful treat that brings a touch of spring to your table. This creamy dessert combines the floral notes of lavender with the sweetness of honey, creating a flavor that’s both soothing and refreshing. Plus, it’s surprisingly simple to make, making it perfect for both seasoned bakers and those new to the kitchen.
With its elegant presentation and delicate flavors, this panna cotta is an ideal dessert for Easter gatherings or any spring celebration. Just a few ingredients come together to create a lovely dish that will impress your friends and family.
Ingredients
- 2 cups heavy cream
- 1/2 cup milk
- 1/3 cup honey
- 2 teaspoons dried lavender
- 2 1/2 teaspoons gelatin
- 1/4 cup cold water
- Pinch of salt
- Fresh lavender and edible flowers for garnish (optional)
Instructions
- Infuse the Cream: In a saucepan, combine the heavy cream, milk, honey, dried lavender, and a pinch of salt. Heat gently over medium heat until just simmering, then remove from heat and let steep for 15 minutes.
- Prepare the Gelatin: While the cream mixture is steeping, sprinkle the gelatin over cold water in a small bowl. Let it sit for about 5 minutes until it blooms.
- Combine: Strain the cream mixture to remove the lavender buds. Return it to the saucepan and stir in the bloomed gelatin until completely dissolved.
- Chill: Pour the mixture into individual molds or cups and refrigerate for at least 4 hours or until fully set.
- Serve: Once set, gently unmold the panna cotta and garnish with fresh lavender and edible flowers, if desired. Enjoy this light and fragrant dessert!
Chocolate-Covered Strawberry Bunnies
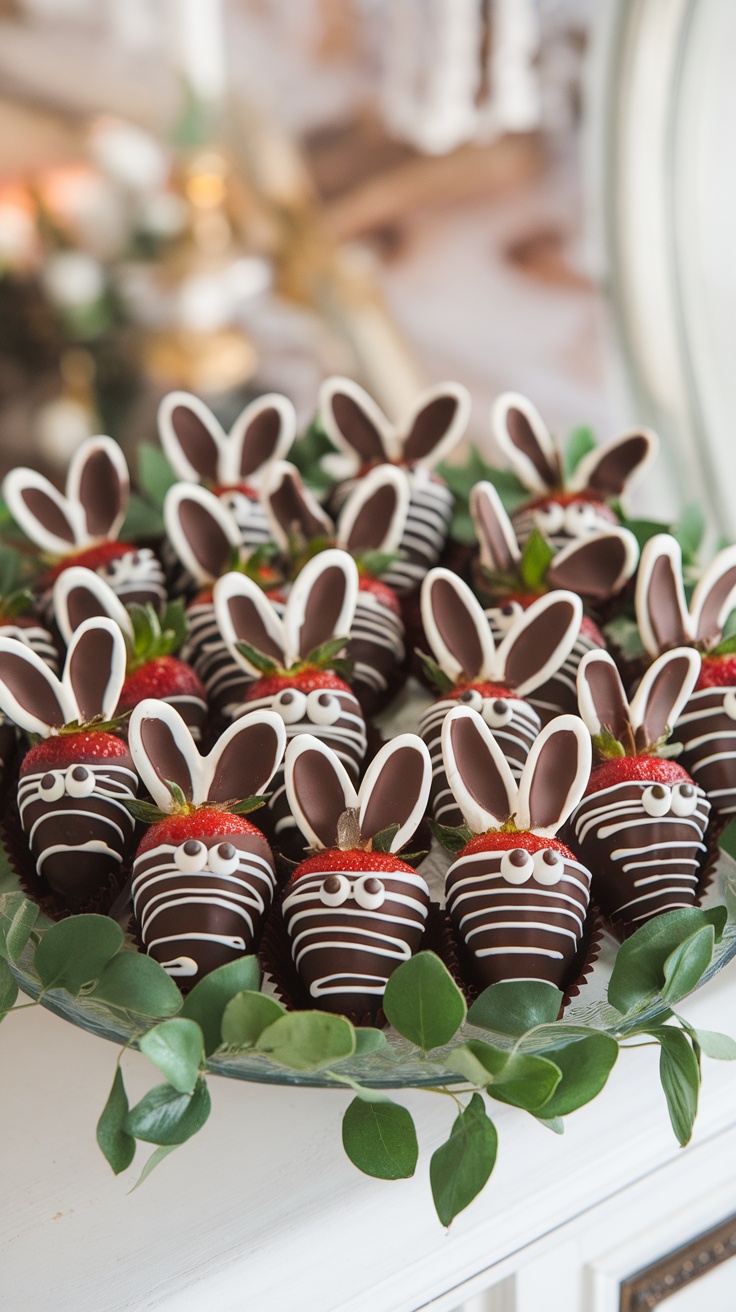
Chocolate-covered strawberry bunnies are a delightful treat that perfectly captures the spirit of Easter. These sweet bites combine the juiciness of fresh strawberries with rich chocolate, creating a fun and festive dessert that’s sure to impress. Plus, they’re surprisingly simple to make, making them a great choice for both baking novices and seasoned pros.
The playful bunny design adds a touch of whimsy, making them not just delicious but also visually appealing. With a few easy steps and some colorful decorations, you can create a batch of these charming treats that will bring smiles to everyone’s faces.
Ingredients
- 1 pound fresh strawberries, washed and dried
- 8 ounces dark chocolate, chopped
- 4 ounces white chocolate, chopped
- 1 teaspoon coconut oil (optional, for smoother chocolate)
- Mini chocolate chips
- Red candy melts or sprinkles (for decoration)
Instructions
- Melt the Dark Chocolate: In a microwave-safe bowl, combine the dark chocolate and coconut oil (if using). Microwave in 30-second intervals, stirring in between, until fully melted and smooth.
- Dip the Strawberries: Hold each strawberry by the stem and dip it into the melted dark chocolate, ensuring it’s fully coated. Let any excess chocolate drip off before placing it on a parchment-lined baking sheet.
- Prepare the Bunny Features: While the chocolate is still wet, press mini chocolate chips into the front of the strawberry for eyes. Allow the chocolate to set slightly.
- Melt the White Chocolate: In another bowl, melt the white chocolate using the same method as before. Then, use a piping bag or a fork to create bunny ears on top of the dipped strawberries.
- Add Details: Use red candy melts or sprinkles to create a nose or embellish the decorations further. Allow everything to set completely in the fridge for about 30 minutes.
- Serve and Enjoy: Once set, arrange your chocolate-covered strawberry bunnies on a platter. They’re ready to be enjoyed at your Easter celebration!
Easter Egg Cake Pops
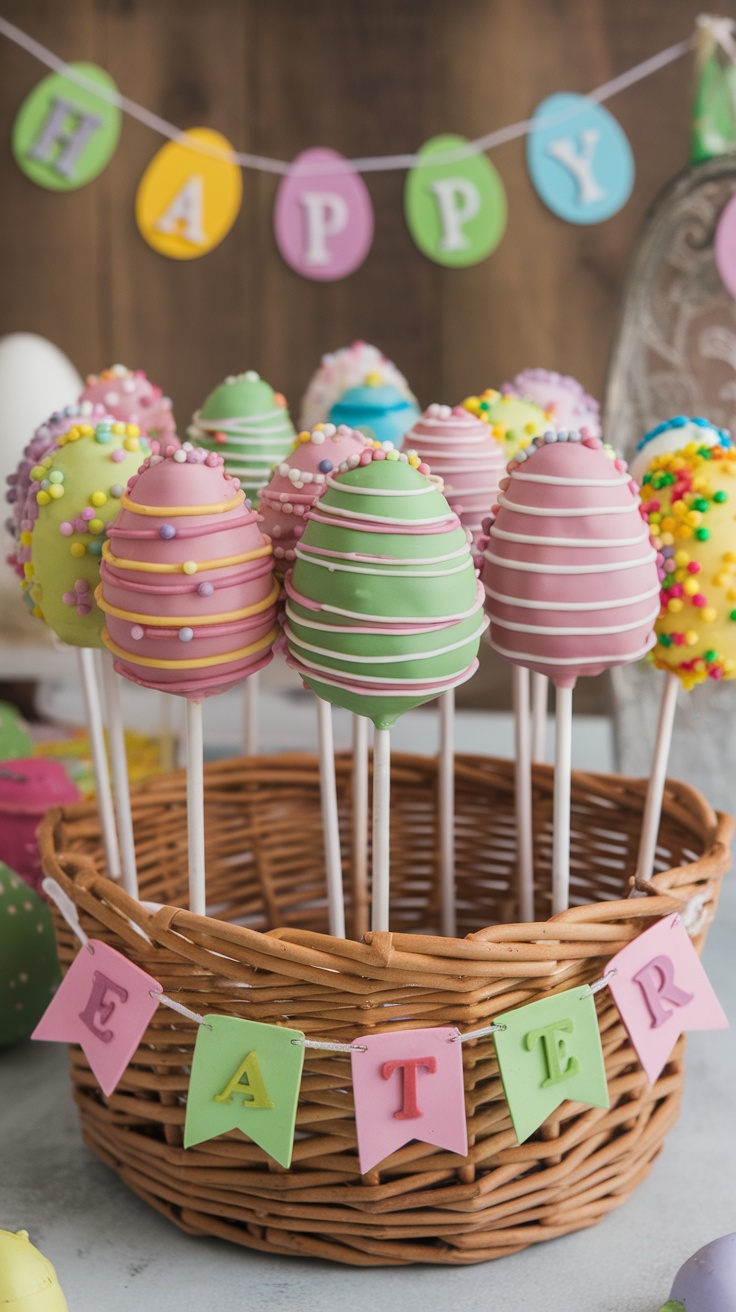
These Easter Egg Cake Pops are delightful treats that are both fun to make and eat. With their colorful, chocolate-coated exteriors and moist cake centers, they bring a cheerful touch to any Easter gathering. Not only do they look festive, but they also taste delicious, offering a sweet and creamy bite that’s sure to please everyone.
The recipe is quite simple, making it perfect for bakers of all skill levels. You can easily customize the colors and decorations to match your Easter theme, turning these cake pops into a creative activity for the whole family!
Ingredients
- 1 box of cake mix (any flavor)
- 1 cup frosting (matching flavor)
- 1 package of candy melts (various colors)
- Lollipop sticks
- Sprinkles and edible decorations
Instructions
- Bake the Cake: Prepare the cake mix according to the package instructions. Once baked, let it cool completely.
- Crumble the Cake: In a large bowl, crumble the cooled cake until it’s fine. Mix in the frosting until fully combined.
- Shape the Pops: Scoop out small amounts of the mixture and roll them into egg shapes. Place them on a baking sheet lined with parchment paper.
- Chill: Insert lollipop sticks into each cake pop and chill in the refrigerator for about 30 minutes, or until firm.
- Melt the Candy: Melt the candy melts in a microwave-safe bowl according to the package instructions.
- Dip the Cake Pops: Dip each cake pop into the melted candy, ensuring they are fully coated. Allow excess candy to drip off.
- Decorate: While the candy coating is still wet, sprinkle with decorations and let them set on a stand or in a foam block.